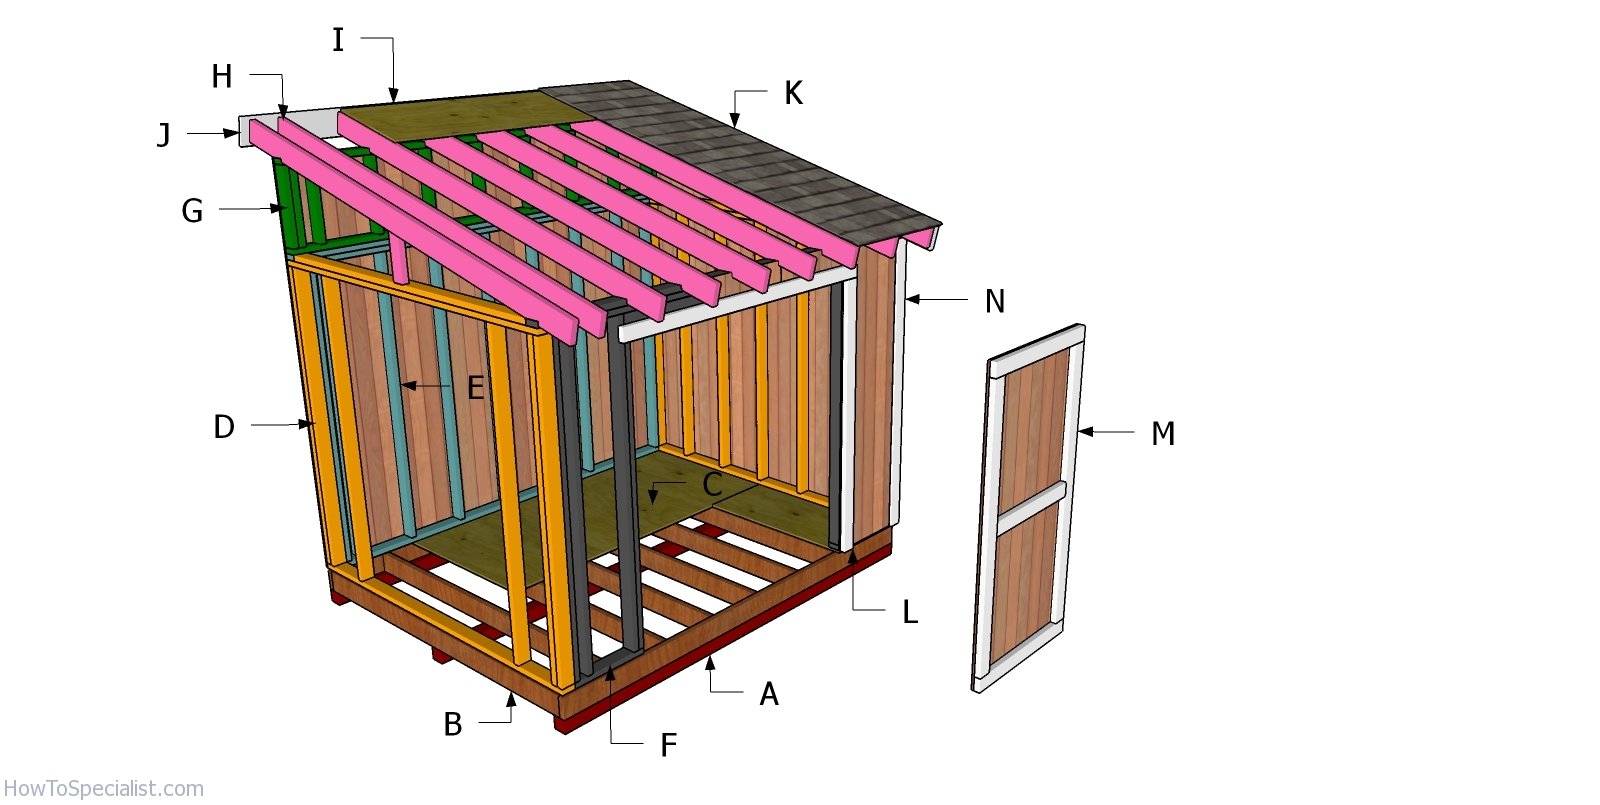
Alright, folks, let's talk sheds! You know, those little havens of storage, workshops, or even cozy reading nooks in your backyard. But let's be real, sometimes the cost of a pre-built shed can feel like a punch to the wallet. That's why we're diving into building your own 8x10 shed, and making it budget-friendly.
Now, I'm not talking about cutting corners on quality, but rather getting creative with materials and taking advantage of some DIY magic. You'll be surprised what you can accomplish with a little bit of know-how and a whole lot of determination.
### Step 1: The Blueprint - Planning is Your Friend
Before we even touch a single piece of wood, let's get our plans in order. An 8x10 shed is a great size for most uses, but think about what you'll be storing and how you want to access it.
Location, Location, Location: Choose a spot with good drainage and easy access. Think about where the sun hits during the day and how that might affect your storage.
Foundation: Do you need a concrete slab, a gravel base, or something else entirely? A simple gravel base is often enough for an 8x10 shed, but if you're planning on a heavier load or a more permanent structure, consider a concrete slab.
Door and Window Options: One door is generally enough for an 8x10, but you might want a window for natural light. Consider where you'll place these and how they'll impact your storage space.
### Step 2: Materials - Getting the Most Bang for Your Buck
Now, let's talk materials. Here's where the fun begins - finding those deals!
Wood: Start with pressure-treated lumber for the foundation and bottom plates. This will prevent rot and keep your shed standing strong. For the walls and roof, you can often find good deals on framing lumber, even if it's a bit rough around the edges.
Sheathing: Plywood is a classic choice for sheathing, and you can find it in various grades and thicknesses. For a budget-friendly option, consider using OSB (oriented strand board).
Roofing: Asphalt shingles are a durable and affordable option for roofing. You can even look into using recycled shingles for a more eco-friendly solution.
Siding: There are tons of options for siding, from traditional wood to vinyl to metal. Choose what fits your budget and style.
### Step 3: The Foundation - Laying Down the Bedrock
First things first, get your foundation ready. A gravel base is often the most cost-effective option for an 8x10 shed. Here's how:
1. Level the Ground: Use a level to make sure the ground is even. You can use landscaping fabric to prevent weeds from growing up through the gravel.
2. Lay the Gravel: Spread a layer of gravel about 4-6 inches deep, making sure it's compacted well.
3. Add a Moisture Barrier: Place a layer of plastic sheeting over the gravel to prevent moisture from seeping up into the wood.
### Step 4: Framing - Building the Bones
Okay, now we're getting into the heart of the construction. Building a frame for your shed is like building a skeleton. Here's the basic process:
1. Measure and Cut: Cut the pressure-treated lumber to size for the bottom plates, which form the base of your frame.
2. Assemble the Walls: Connect the bottom plates to the vertical wall studs using screws or nails. Make sure everything is level and square.
3. Roof Framing: Build the roof trusses using 2x4s or 2x6s. You can find pre-made trusses for sale, or build your own with a simple design.
4. Erect the Walls: Once the roof trusses are assembled, carefully lift the walls into place and attach them to the bottom plates.
### Step 5: Sheathing and Roofing - Skin and Hair
Now, it's time to add some layers and protection.
1. Sheathing: Attach plywood or OSB sheathing to the exterior walls and roof. Make sure the sheets overlap for a strong and waterproof seal.
2. Roofing: Install the underlayment, then lay down your asphalt shingles. Remember to follow the manufacturer's instructions for proper installation.
3. Siding: Finally, add your siding. If you're using wood, make sure to seal it with a weather-resistant finish.
### Step 6: Finishing Touches - Putting the Shine on
Here's where you add those final touches that make your shed stand out.
1. Doors and Windows: Install your doors and windows, making sure they fit securely and are weatherproofed.
2. Trim and Molding: Add trim around the doors, windows, and roofline for a polished look.
3. Interior Finishing: Consider painting the interior walls or adding insulation to make your shed more comfortable.
4. Flooring: Install your flooring, whether it's concrete, plywood, or something else entirely.
### Step 7: The Finishing Touches: It's Not Just a Shed Anymore
Now that you've got a basic shed structure, let's consider how to make it your own.
Paint and Personalization: Give your shed some personality with paint, a fun door handle, or decorative elements.
Storage Solutions: Maximize your space with shelves, pegboards, or even hanging racks.
Lighting: Add some lights inside and maybe a porch light outside to create a welcoming atmosphere.
Electrical: If you plan to use your shed for work or hobbies, you might want to add electricity. Make sure to consult with an electrician for safe installation.
### Conclusion: Your DIY Shed Awaits
Congratulations! You've just built your very own 8x10 shed, and on a budget, no less.
Remember, the beauty of DIY is that you can tailor it to your needs and preferences. Don't be afraid to get creative and add your own personal touches.
And hey, if you're feeling really ambitious, consider adding a porch, a window box, or even some landscaping around your new shed. The possibilities are endless!
So, what are you waiting for? Grab your tools, gather your supplies, and start building your dream shed! You've got this!


No comments:
Post a Comment
Note: Only a member of this blog may post a comment.